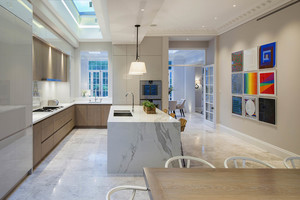

A kitchen splashback protects the wall behind a worktop, sink or hob, but it also has a strong visual effect on the whole room. The best choice balances heat and water resistance, cleaning, installation and cost with the colour, pattern and texture of the kitchen.
Tiles remain the most flexible option, while glass, mirror, stainless steel and worktop-matched slabs reduce grout lines. Start with the practical demands of the position, then decide whether the splashback should blend into the room or become its focal point.

How to choose a kitchen splashback
Consider the surface in context. Behind a sink it must tolerate repeated splashes and wiping. Behind a hob it may face grease and heat, and the required separation depends on the hob, cooker and splashback material. Follow the appliance and material manufacturers' instructions rather than applying one generic distance.
The number of joints affects maintenance. Small tiles create more grout lines; a large slab, glass panel or metal sheet can be wiped with fewer interruptions. That does not automatically make a grout-free finish better: templating, edge details, socket cut-outs and replacement can be more expensive.
- Tile: flexible in colour, pattern and budget, but requires grout and careful setting out.
- Quartz or stone: creates a seamless worktop-to-wall look, with weight, fabrication and material-care considerations.
- Glass or mirror: visually light and easy to wipe when correctly specified and fitted.
- Metal: durable and distinctive, although fingerprints, scratches and patina affect the appearance.
- Laminate or composite panel: can be economical and quick to install, but suitability near heat varies by product.
Tile splashback ideas
Tiles suit almost every kitchen style because format, glaze, colour and laying pattern can be varied independently. Before choosing a pattern, check whether the tile edges, thickness and dimensional variation support it. Handmade-look tiles can create a relaxed finish but demand more judgement during setting out.
1. Use white tiles with texture rather than flat colour
White tiles do not need to feel clinical. A geometric relief, uneven glaze or narrow vertical format catches light and brings detail without competing with cabinetry. In a small kitchen, keeping the wall and grout relatively light can maintain visual continuity.
2. Lay narrow tiles vertically
A vertical stack can make the space between worktop and wall units feel taller. It works particularly well with calm cabinetry because the repeated joints provide a clear rhythm. Check the starting line carefully: vertical errors become obvious across a long run.


3. Add movement with a herringbone pattern
Herringbone is effective on a contained splashback because the pattern adds movement without covering every wall. It needs more cuts and creates more waste than a straight stack, particularly at edges and around sockets. Lay out several rows before fixing so small triangular cuts do not accumulate at the ends.
4. Choose a feature tile for one controlled area
A patterned or irregular tile can define the hob wall while quieter surfaces sit elsewhere. Repeat one colour from the cabinetry, worktop or flooring so the feature feels connected. If the tile has a strong repeat, order enough from one batch and plan the motif before adhesive is mixed.
5. Keep metro tiles current with the joint detail
Metro tiles are durable, widely available and easy to replace. The layout and grout colour decide whether they feel traditional or contemporary. A stacked arrangement is cleaner; a brick bond feels familiar; contrasting grout emphasises every line and every slight alignment error.


Stone, quartz and slab splashbacks
6. Continue the worktop material up the wall
Using the same quartz, sintered surface or stone on the worktop and splashback creates a calm, continuous finish. It also removes most grout lines. The material must be templated and fabricated accurately around sockets, corners and extractor details, so decisions are needed before installation.
7. Use marble carefully for a timeless focal point
Marble brings natural movement and variation, but it can etch or stain and may need sealing. Ask the supplier how the exact stone should be maintained and whether it is appropriate for the planned position. Quartz and porcelain slabs can offer a related visual effect with different care requirements.
8. Let terrazzo connect the worktop and wall
A full terrazzo or terrazzo-effect slab can carry colour through a dark kitchen and reduce visual joins. Scale matters: a large aggregate pattern needs enough uninterrupted area to read properly. Agree where seams, sockets and cut-outs will fall before fabrication.


Glass, mirror and metal splashback ideas
9. Use clear or coloured glass for an uninterrupted surface
A correctly specified glass panel is easy to wipe and can protect paint or wallpaper beneath it. Toughening, polishing, socket cut-outs and fixing method should be agreed with the supplier. Once toughened, glass generally cannot be altered on site, which makes accurate templating essential.
10. Brighten a narrow kitchen with mirror
Mirror can bounce light through a galley layout and visually widen the space. Antiqued mirror disguises marks better than a pristine reflective sheet and suits more traditional kitchens. Check heat suitability, edge sealing and the effect of reflecting open shelves or worktop clutter.
11. Add warmth with brass or character with stainless steel
Brass, copper and stainless steel introduce a strong material contrast. A living metal may change colour and develop a patina; a lacquered finish behaves differently. Stainless steel is practical around cooking areas but shows fingerprints and fine scratches, so decide whether a pristine or working-kitchen appearance is expected.


How high and wide should a splashback be?
A splashback can cover only the sink or hob zone, fill the space between worktop and wall units, or continue to the ceiling. The right choice depends on the risk of splashes, the room proportions and the material cost. A small panel is economical; a full-height wall creates greater visual impact and easier wiping.
Use changes in architecture as natural stopping points: the underside of shelves, the edge of tall cabinetry, a window reveal or the end of a worktop. An arbitrary line in the middle of a wall often looks unresolved. At exposed ends, decide whether the top row, side edge or trim will be visible.
Splashbacks behind hobs
Do not choose the height or material by appearance alone. The hob or cooker instructions may specify clearances and suitable surrounding surfaces. Combustible panels, timber trims and some laminates may be restricted. Coordinate the splashback with the extractor and any wall units before installation.
Splashbacks in small kitchens
A continuous pale or reflective surface can reduce visual interruption, but a small room can still carry colour. Keep the number of competing finishes controlled and repeat one tone elsewhere. Large tiles mean fewer grout lines, although their scale and cut positions need careful planning around short wall runs.
Planning a DIY tiled splashback
A small ceramic splashback can be a realistic DIY project when the wall is sound, flat and prepared correctly. The setting out determines the finish: find a reliable level line, plan the centre or focal point, and avoid tiny cuts at the most visible edges. Never assume the worktop is perfectly level.
Our best tile cutters for DIY kitchens guide compares manual cutters for fast straight cuts with powered wet cutters for harder materials and awkward shapes. Match the cutter to the tile rather than buying solely by price or maximum length.
A reliable reference line becomes more valuable on long runs, stacked layouts and herringbone patterns. See our best laser levels for home renovation for cross-line and 360-degree options that can help transfer a consistent height around the room.
Renovation often involves removing old grout, scraping adhesive and trimming panels or timber around difficult details. Our best oscillating multi-tools guide explains corded and cordless choices, accessory compatibility and the limits of using one near tiles and hidden services.
Prepare the wall before tiling
Remove loose paint, grease, failed adhesive and unstable material. The substrate must be suitable for the tile, adhesive and environment. Significant movement, moisture damage or an uneven wall should be corrected rather than hidden beneath a new finish.
Plan sockets and services safely
Electrical work and alterations around socket boxes must be handled safely and may require a qualified electrician. Isolate relevant circuits before removing faceplates, identify hidden cables and pipes, and do not use a cutter or multi-tool blindly around services.
Cleaning and maintaining a kitchen splashback
Clean cooking residue after the surface has cooled, using the least aggressive method recommended for the material. A soft cloth and appropriate cleaner are enough for many everyday marks. Abrasive pads, acidic products and strong alkaline cleaners can damage glaze, metal, stone, sealers or grout.
Grout needs particular attention because grease can build up in its textured surface. Sound sealed tiles may tolerate carefully applied steam, but steam is unsuitable for some natural stone, damaged grout, failed silicone and heat-sensitive panels. Our best steam cleaners for tiles and grout guide explains attachments, formats and the surfaces to avoid.
- Tile and grout: wipe regularly, use grout-safe products and repair cracks rather than cleaning over them.
- Natural stone: follow the stone and sealer supplier's care instructions; avoid assumptions about acids or steam.
- Glass and mirror: use a non-abrasive method and dry the surface to reduce streaks.
- Metal: clean with the grain where relevant and use only products approved for the finish.
- Panel systems: keep joins dry and avoid heat or chemicals outside the manufacturer's limits.
Common splashback mistakes
- Choosing style before suitability: confirm heat, moisture and cleaning requirements for the exact location.
- Ignoring socket cut-outs: plan these before ordering glass, mirror, stone or other fabricated panels.
- Starting from an uneven worktop: establish a true datum so tile rows do not visibly drift.
- Creating tiny edge cuts: dry-plan the layout and adjust the starting point before fixing.
- Using too many finishes: connect the splashback to the cabinetry, worktop and flooring rather than adding an unrelated fourth statement.
- Forgetting maintenance: understand sealing, grout cleaning, patina and replacement before committing.
How much does a kitchen splashback cost?
Cost depends on area, material, preparation, cut-outs and labour. Simple ceramic tiles can be economical, but intricate patterns add cutting time and waste. Toughened glass, mirror and fabricated slabs cost more to template and manufacture, particularly when several sockets or corners are involved.
Price the complete installation: substrate repairs, adhesive, grout, trims, sealant, cutting, electrical work and waste all matter. Keep spare tiles or the material reference for future repairs. For the wider project, use our renovation cost calculator to organise the overall kitchen budget.
Kitchen splashback planning checklist
- Identify the wet, greasy and heat-exposed areas that need protection.
- Check the hob, cooker and material manufacturers' clearance guidance.
- Measure walls, corners, sockets, shelves and extractor details accurately.
- Choose a material whose cleaning and maintenance suit the household.
- Plan the tile or slab layout before ordering and allow sensible wastage.
- Confirm substrate preparation, adhesive, grout, trims and sealants.
- Coordinate electrical alterations and fabricated cut-outs before installation.
- Keep spare tiles or product details for later repairs.
Frequently asked questions
What is the best material for a kitchen splashback?
There is no single best material. Tiles offer flexibility and value; glass and slabs reduce grout lines; metal is durable and distinctive. Choose for the exact heat, moisture, cleaning and design requirements.
Do you need a splashback behind a kitchen sink?
A water-resistant, wipeable surface protects the wall from repeated splashes. Its height and width depend on the sink position, taps and surrounding finishes.
Can any splashback go behind a hob?
No. Check the hob or cooker instructions and the splashback manufacturer's heat and clearance guidance. Some combustible or heat-sensitive panels are unsuitable.
What is the cheapest kitchen splashback?
Simple ceramic tiles or an appropriate panel can be economical, but include preparation, adhesive, grout, trims, cut-outs and labour when comparing the total cost.
Can you tile a kitchen splashback yourself?
A small ceramic splashback can suit a competent DIYer when the wall is sound and the layout is straightforward. Complex patterns, hard materials, large slabs and electrical alterations may need specialists.
How do you keep splashback grout clean?
Wipe splashes promptly, use products suitable for the grout and repair cracks or failed joints. Steam should be used only where the surface and grout are sound and the manufacturer permits it.