

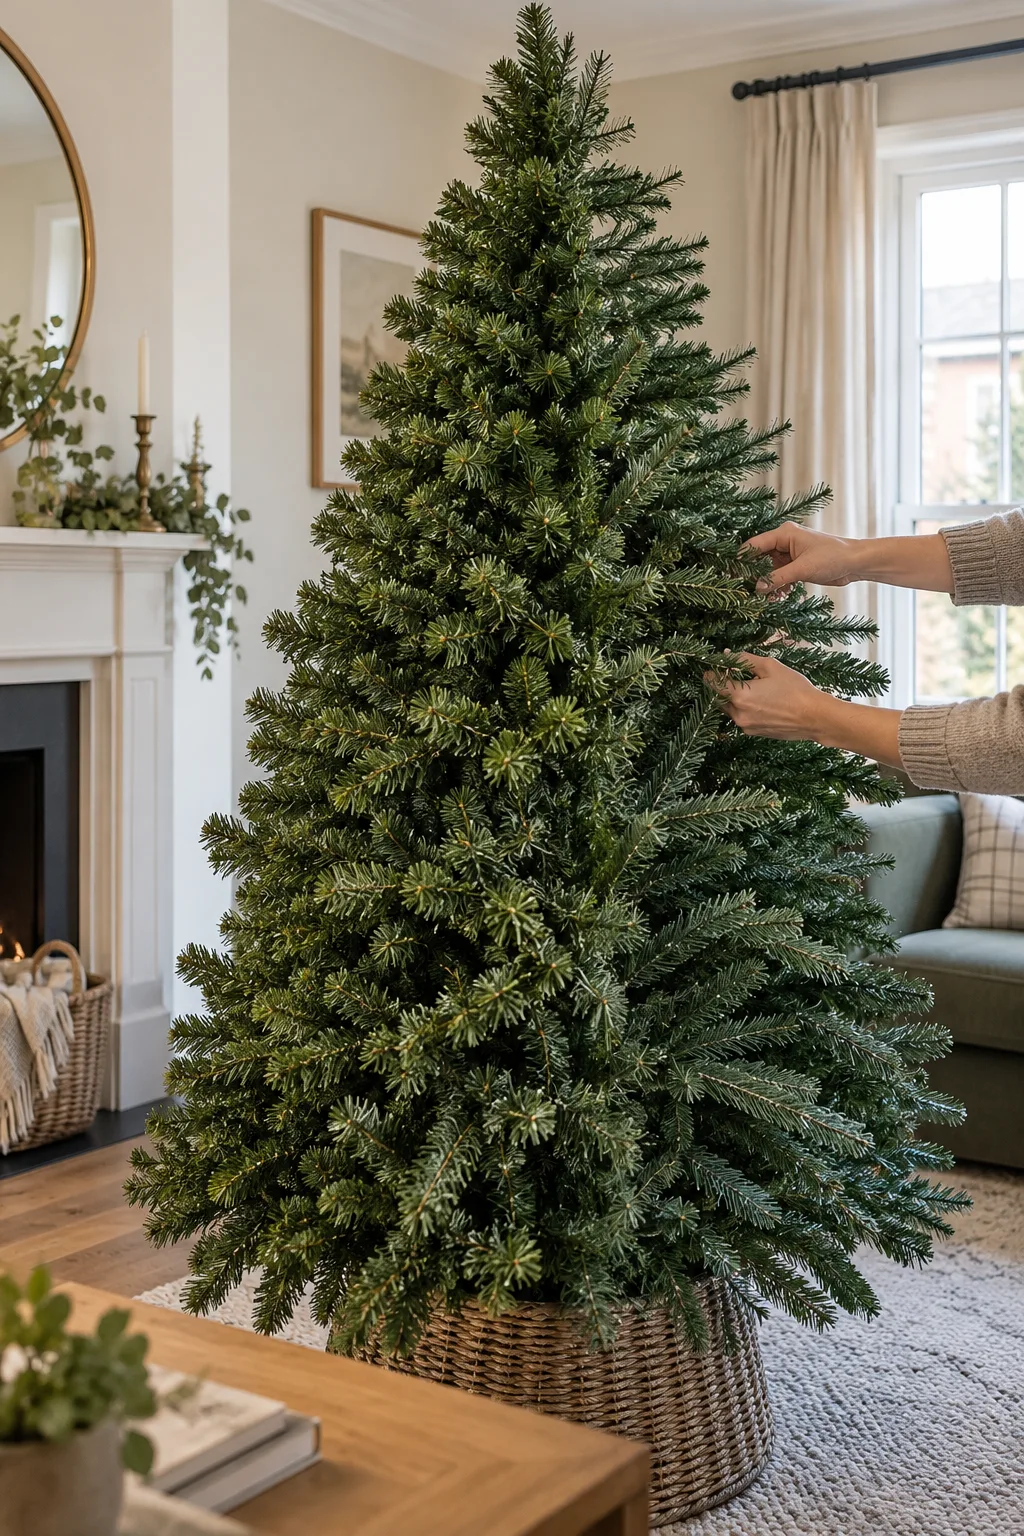
Bringing last year’s artificial Christmas tree out of storage and hoping it looks as full as possible? The branches may look a little flat when you first unpack it, but careful shaping can help you get the best from the tree you already have.
To make an artificial Christmas tree look fuller, fluff it from the bottom up before adding decorations. Secure the stand, open the branches nearest the centre pole, then fan the outer tips in different directions. Step back to spot gaps and repeat around each section. If the pole is still clearly visible after careful shaping, the tree may simply lack enough foliage.
If you’re still choosing a tree, our guide to a realistic-looking artificial tree covers foliage, shape and room fit.
1. How to fluff an artificial Christmas tree, step by step
Give yourself space to walk around the tree while you work. Shaping one section at a time makes it easier to see what needs attention.
- Secure the stand. Put it on a level surface and fit the trunk as the maker directs. Check that the tree is stable before pulling branches into place.
- Start at the bottom. Fit the lowest section and work all the way around it before moving upwards. If the tree is pre-lit, connect and test each section in the order given in its instructions.
- Separate the inner tips. Open the foliage closest to the centre pole first, angling tips sideways and upwards to cover the trunk. Do not force a hinge or bend a rigid tip beyond its normal movement.
- Work outwards. Fan the middle and outer tips upwards, sideways and slightly forwards rather than pulling them all towards you.
- Arrange individual tips. Gently separate any clumps so neighbouring tips point in different directions. This gives the branches depth without relying on decorations to cover every opening.
- Check gaps and repeat. Step back to look from the sofa and doorway, then adjust thin patches. Repeat for each section, including the top, before adding lights or ornaments.
National Tree Company’s shaping demonstration shows the inner foliage being opened rather than left flat against the pole. Follow your own tree’s instructions wherever its branch construction differs.
2. How to fix gaps and a visible centre pole
If you can see through to the pole, check the tips nearest the trunk before moving outer branches. A tree can look full from one angle but flat from another, so walk around it and look from the places you normally sit. Turn or re-angle small groups of tips; do not drag every branch towards one gap.
Give the top the same attention as the lower sections. Leave enough support for a topper, and avoid one that pulls the top stem to one side.
| What you see | Try first | When to stop |
|---|---|---|
| Centre pole visible | Open inner tips around the whole section, then fan the outer tips. | Shaping cannot create foliage where there are too few branches. |
| One flat side | Check the tree from several viewpoints and rotate it if appropriate. | Do not force hinges or sharply bend rigid moulded tips. |
| Gaps near the base | Separate the lower branches and their inner tips before adjusting the outer edge. | Keep the stand stable and do not overload weak branches. |
| Thin-looking top | Open its tips individually and choose a suitably light topper. | Do not overload the top stem. |
On a phone, swipe across the table to see all three columns.
3. Decorating to make a tree look fuller
Shape the foliage first. On an unlit tree, suitable lights placed a little deeper among the branches can give the centre a glow instead of leaving all the light on the outside. Keep cables tidy and follow the light maker’s instructions. Electrical Safety First’s Christmas-light advice is worth checking before reusing older lights.
Hang some larger ornaments slightly inside the tree and smaller ones near the tips to create layers. A loosely draped ribbon can soften a modest gap, but wrapping it tightly may flatten the branches you have just shaped. Decorations can add depth; they cannot replace missing foliage.
4. What to do if your tree still looks sparse
If the pole remains obvious from across the room after you have opened every section, the tree may be too sparse for the look you want. Bent branch wires, damaged hinges or an unexpectedly narrow shape can also limit what styling will achieve. More baubles will not fix a structural problem.
If you decide to replace it, compare undecorated photographs of the exact height and look for enough inner foliage as well as a pleasing outer shape. Our PE versus PVC guide explains the different tip styles; the 7ft tree comparison shows how much the footprint can vary at the same height.
Frequently asked questions
Why does my artificial Christmas tree look sparse?
Branches often arrive compressed from storage. Open the inner tips first and work outward. If you can still see large gaps after thorough shaping, the tree may simply have a sparse construction.
Should I shape an artificial tree before adding lights?
Yes. Shape each section before decorating so you can see and fill gaps. For a pre-lit model, follow its manual and check that the lights work during assembly.
Can decorations make a thin artificial tree look fuller?
Well-spaced lights, ribbon and ornaments can help, but they cannot replace missing branches. Start by shaping the foliage and avoid loading weak tips with heavy decorations.
How long should shaping a new tree take?
The first setup can take longer because the branches arrive compressed in the box and need opening and arranging individually. Work section by section rather than rushing; later setups may be quicker if the tree is stored without crushing its tips.
Will a PE tree look fuller than a PVC tree?
Not automatically. PE describes moulded foliage; PVC describes flatter cut foliage. Tip density, placement and careful shaping determine fullness.
Getting the best from your tree
Start with the foliage, not the decorations. Work from the centre outwards, check the shape from around the room, then add lights and ornaments for depth. If the tree still looks bare after careful shaping, it is fair to recognise that the design—not your decorating—is the limit.


 Sign up with Facebook
 Sign up with Google
